

Dreamhost WordPress tutorial
In this Dreamhost WordPress tutorial, we will show you how to install WordPress using the Dreamhost control panel.
First of all, we must clarify that it is not necessary to have a dreampress plan on dreamhost to install WordPress. In our case we have the shared unlimited plan and with that plan we can manage our WordPress websites without any problem.
Creating a website on Dreamhost
- The first thing we must do is to log in to our DreamoHst control panel.
- Then we must select the option “Websites” > “Manage Websites”

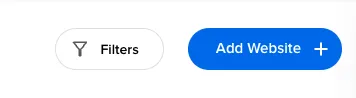
- Now from this screen, we must click on the button with the text “Add a website”.
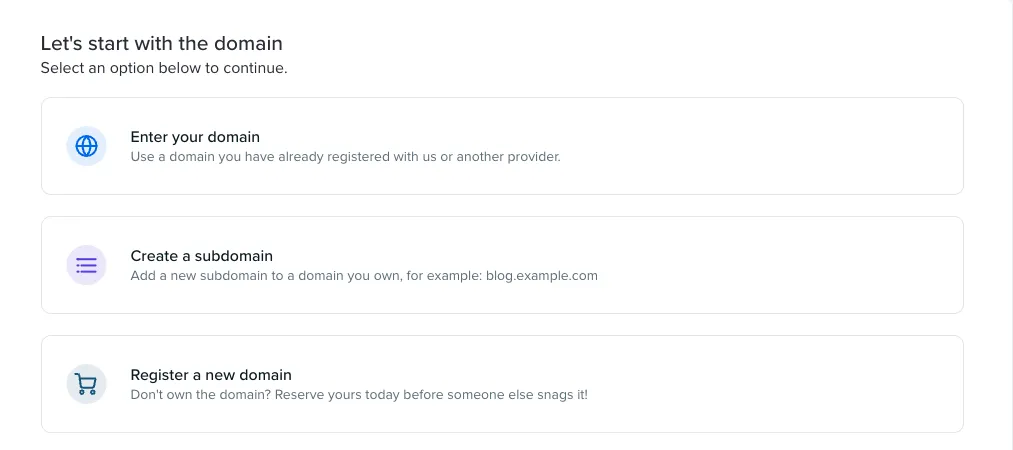
- Now we must select the domain where we will host our website.
- The first option we have is to select a domain, either we have a domain with dreamhost or a domain with some other provider.
- The second option is to create a subdomain.
- And the third option is to register a new domain.
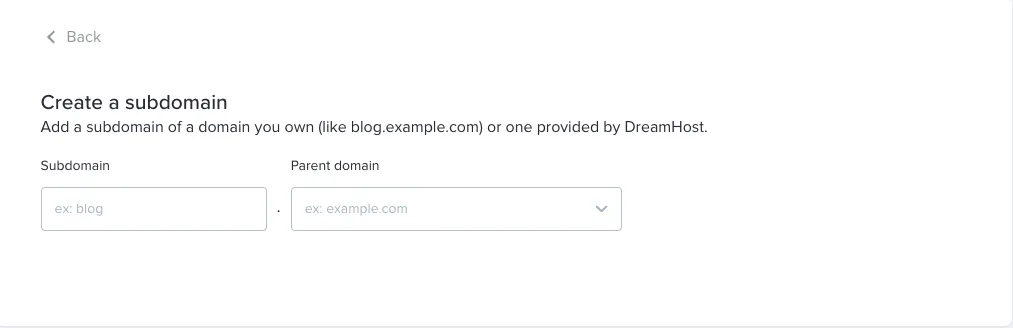
- For this example, we will register a test subdomain
- For this example, we will register a test subdomain.
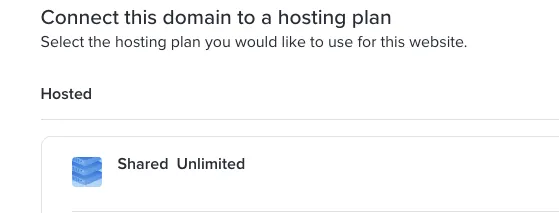
- The next step is to select the hosting, we will select the shared unlimited option.
- After that, we will click on the “Configure web site” button, this will start the process of creating the web site.

- Once the website creation process is completed, we can do the WordPress installation.
Installing WordPress on Dreamhost
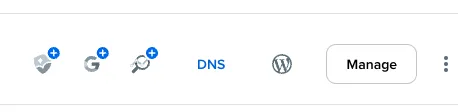
- First, we must click on the “Manage” button.

- When we do this, we will be shown a screen with all the available actions for our website.
- Now we must select the “install” option within the WordPress section.

- When we click on install, we will be shown a screen with some options to help us with the installation of WordPress. In this case we will select the option of none, since we want to do a clean installation. Subsequently, we click on “next”.

- Now we are suggested to install some plugins, the two plugins shown below we recommend to install.

- Finally, click on the install button and the wordpress installation will start.

- Once WordPress is installed on our website we can manage it from the dreamhost panel, now inside the admin options we can find a WordPress icon.
- Clicking on the WordPress icon will take us to the WordPress installation we have just created.
- Finally, we recommend to create a new password and store it in a safe place.
